Thursday, May 31, 2012

Pan-Roasted Chicken with Lemon-Garlic Green Beans (Asparagus)

Ok, so pan-roasting anything doesn't sound like your typical hot weather recipe - especially with the mid-to-high 90s weather we had the day I made this.  But when Alex works a 14+ hour day, grilling isn't really an option.  If we don't have leftovers (which I usually try and plan for, but we had used up our leftovers on his last 14+ hour day), I need something I can cook for myself at a normal hour and reheat easily when the hospital finally sets him free.

I had had this recipe hanging around on my Pinterest for awhile but waited until I could make it to Whole Foods for some organic red-skinned potatoes...  Then, when I did get to Whole Foods, they didn't have any green beans.  In the entire store.   They had asparagus, which we love, and which I figured would taste delightful with lemon and garlic.  Hence said substitution in the title.  I made a few other changes to the original recipe, including cooking a bit more so that we could have the leftovers the following day.... Because it was yet another 14+ hour day...

Recipe: (from Real Simple via Pinterest)
6 tablespoons olive oil
2 lemons, 1 thinly sliced, 1 juiced
4 cloves garlic, minced (Since I was cooking more, I used 6 cloves.)
1 teaspoon kosher salt
1/2 teaspoon freshly ground black pepper
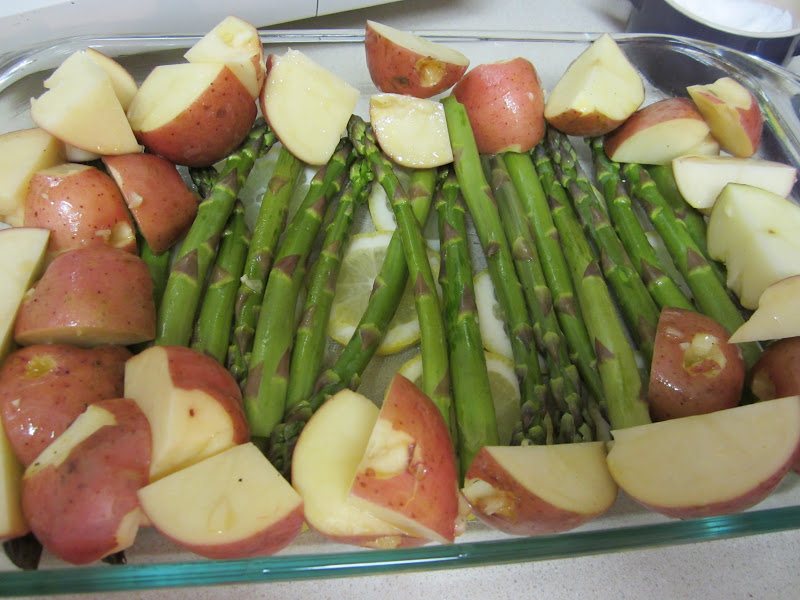
3/4 pound trimmed green beans (I used asparagus.)
8 small red potatoes, quartered (I used 9.)
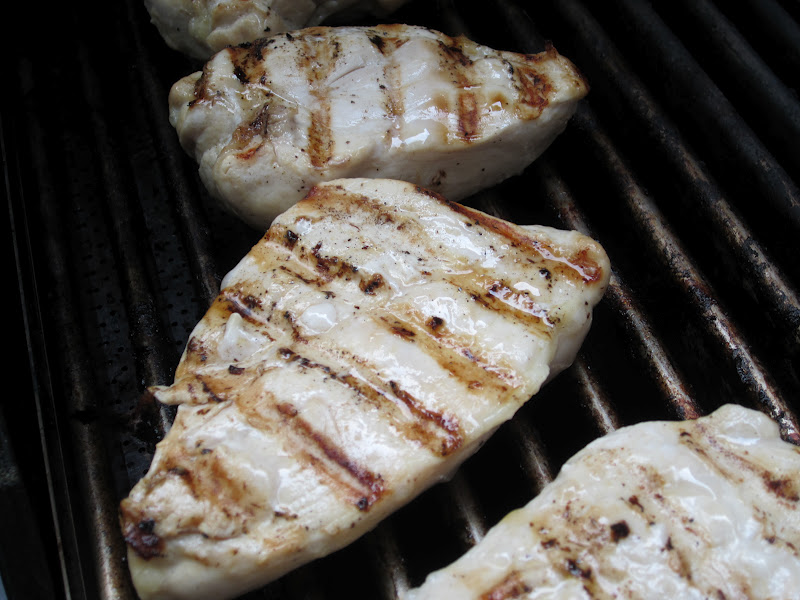
4 chicken breast - bones left in, with skin (I used boneless, skinless chicken breasts and also added 2 chicken thighs lingering in the freezer as I continue my mission to use the food we have before moving!)

Preheat oven to 450 degrees.  Coat a large baking dish or cast iron skillet with 1 tablespoon of the olive oil.  Arrange lemon slices in a single layer on the bottom of the dish or skillet.

In a large bowl, combine the remaining olive oil, lemon juice, garlic, salt, and pepper; add the green beans (or in my case asparagus) and toss to coat.

Using a slotted spoon or tongs, remove the veggies and arrange them in a single layer on top of the lemon slices.

Add the potatoes to the same olive oil mixture and toss to coat.

Using a slotted spoon or tongs, arrange the potatoes along the inside edge of the baking dish or skillet on top of the veggies.

Place the chicken in the same olive oil mixture and coat thoroughly.  Place the chicken (skin-side up if using chicken with skin on) in the dish or skillet.  Pour any of the remaining olive oil mixture over the chicken (I did not have any leftover).


Roast for 50 minutes.  Remove the chicken from the dish or skillet.  Place the veggies and potatoes back in oven for 10 minutes, until potatoes are fork tender.


Verdict:
First of all, it was delicious, and I will be making it again.  But there are a few things I would modify and/or change from the original recipe.

I don't know why, but cooking chicken at 450 degrees for 50 minutes sounded like a very, very long time to me.  My intuition told me to check it out after 30 minutes, and I was glad I did. The chicken was definitely done.  I did put the veggies and potatoes back into the oven for another 10 minutes.  The potatoes definitely needed more cook time.  I don't know if it was because I used boneless, skinless chicken breasts or if their cooking temp/time was just a bit off...  But several other reviewers shortened the cooking time and/or lowered the temperature to 425...400...even 350 in some cases.  Also, while the asparagus was by no means burned or ruined, it was a bit mushy and could have been cooked a bit less.  Again, I don't know if this would have been the same result if I had used green beans, but since several other reviewers also had similar experiences, while using green beans, I will probably lower the oven temperature as well next time.

In fact, the only part of the dish where the original cooking time might have been right on was the potatoes.  A few of the smaller pieces were perfectly cooked.  A few of the larger pieces could have used a bit  more time in the oven.  I would suggest really making sure that all potatoes really are small.  Or if you have a few larger ones, cut them into eighths etc. so that all the pieces are relatively close to the same size and will cook more evenly.

Some reviewers of this recipe found the taste, especially the green beans, to be on the bitter side.  We did not find this to be the case at all, but we really like lemon, and we really like garlic.  Perfect combination.  Some commenters suggested using the lemon juice but not the lemon slices, adding an orange slice with the lemon slices to cut the bitterness, or simply making sure to roll the lemon before slicing it...  I guess this brings out more of the juices when cutting and decreases the bitterness that comes out when cooking...  I don't know.  While the asparagus especially was very lemony, again we liked it.

All in all, the chicken was juicy, the potatoes were tender but crispy, the veggies were a little garlicky with a refreshing lemony zing....  And although an oven at 450 degrees is not usually what I want in my house on a 90+ degree day... It was a wonderful one-dish meal!

Wednesday, May 30, 2012

Key Lime Pie Sandwiches

An ice-cold, no-bake sweet treat?  Count me in!  On these hot days, not only do I need dinners that aren't cooked in an oven, but at the end of the day something cold and refreshing really hits the spot!

Recipe: (from hungrygirl via Pinterest)
1/2 fat free plain Greek yogurt
1 1/2 tablespoons sugar
1 tablespoon lime juice
2 sheets graham crackers, broken into 4 squares (The recipe called for low-fat cinnamon graham crackers, which I am sure are delicious; however, the name of the game these days is 'use up what's left in the cupboard, so I have less to move,' so plain old regular grahams worked just fine!)

To make the filling, combine yogurt, sugar, and lime juice in a bowl.  Mix thoroughly.

Cover and place in the freezer for 25-30 minutes, until it reaches a soft serve-like consistency, very thick but soft enough to stir.

Place 2 graham cracker squares on a plate (cinnamon side down, if using).  Give filling  stir and evenly distribute between the 2 graham cracker squares, about 1/4 cup each.  Gently place another graham cracker square over each filling topped square.

Place in freezer until firm, at least 1 hour (I wrapped mine as well).

Verdict:
Nice and simple.  Cool and refreshing.  The right combination of tart and sweet, just like a slice of key lime pie.  And, for an ice cream treat, quite low in calories and fat and such.  Plus, I actually made three sandwiches out of the filling recipe above. 

Tuesday, May 29, 2012

Beer Marinated Grilled Chicken

It's been pretty hot and humid here lately...  Mid to high 90s.  Ick.  And when the weather gets like that, the last thing I need is for my oven or stove to be in use!

Searching for dinner recipes that don't need to be cooked.... Or are cooked on the grill... (I can only eat popsicles or chips and salsa for dinner so often.)

And on a hot, muggy day, what's more refreshing than a nice, cool, citrusy beer?  Mmmmmmm.....

Recipe: (from Heather's Dish)
chicken breasts (although the original recipe called for legs and thighs with skin on, I made an executive decision and went with boneless, skinless breasts)
1 can or bottle of beer (I used Alex's favorite: Lienenkugel's Summer Shandy)
2 teaspoons salt
2 teaspoons pepper
2 tablespoons olive oil (although honestly, I didn't measure any of the previous 3 ingredients)

Lay the chicken in a large baking dish and cover with beer.

Sprinkle with salt and pepper then drizzle with olive oil.

Marinate in the refrigerator 6-8 hours, turning once halfway through.


Hand off to your grill master.....  And while someone else handles the rest of the work, enjoy a beer of your own (another bonus of cooked on the grill meals)!


When done, serve with some grilled veggies or fruit or potatoes or corn or salad...


Verdict:
Alex: "This meal is fan-friggin-tastic!  And make sure you put that on the blog."  ;-)

He was right.  It was delicious.  And easy.  And refreshing for hot summer weather.  The chicken was tender and juicy.  Unexpectedly we could actually taste the flavor of the beer in the chicken.  It was great BUT just make sure you use a beer you actually like.

Sunday, May 27, 2012

Garlic Chicken Stir Fry with Quinoa, Peppers, and Basil

After my first disastrous attempt at cooking with quinoa, I noticed this recipe on the back of the box (purchased at Trader Joe's).  Since it didn't require serving with lukewarm yogurt and sounded quite appetizing, I decided to give it a shot!

Recipe:
1 cup quinoa, prepared with chicken stock, according to package directions
2 cups chicken broth
1 1/2 pounds boneless, skinless chicken breasts
5 tablespoons olive oil
1 small onion, thinly sliced
1 yellow bell pepper, seeded and thinly sliced
1 red bell pepper, seeded and thinly sliced
5 cloves garlic, thinly sliced
20 leaves, fresh sweet basil, julienne (I forgot to do that part... my leaves were just whole... oops!)
grated parmesan cheese
salt and pepper to taste

Prepare quinoa with chicken broth according to package directions: 1 cup quioa: 2 cups chicken broth in pan; bring to a boil; reduce to a simmer, cover, and cook until all liquid is absorbed (10-15 minutes).

Meanwhile, cut chicken into 1 inch pieces. Heat large nonstick skillet over high heat and add olive oil.  Add chicken and saute about 5 minutes, or until golden brown (mine took closer to 10).

Add onions, bell peppers; saute for 1-2 more minutes.

Add garlic and saute until peppers become slightly limp, but still bright, about 1-2 minutes.  Season as desired with salt and pepper.

Remove the pan from heat; add basil and quinoa.  Toss until basil wilts.

Garnish with parmesan cheese when serving.

Verdict:
Much more successful than the previous attempt!  Nothing fancy or rock-your-tastebuds amazing but good, basic, well seasoned, filling food for a regular weeknight dinner.  I finished my portion, Alex went back for seconds, and it reheated well for my lunch for the next 2 days.  Not too time consuming and not an awful amount of dishes for the clean-up process.  Something I'll keep around.

But I have to stop looking at recipes that 'serve 4' as dinner for us for 2 nights.  Sigh....  Put me in a bit of a pickle when hubby went back for seconds since I had planned on eating it again the next night and had no other options in the house..... And couldn't go to the grocery store because due to a flat tire, Alex was using my car for 2 days.....

Oh well, at least it means he liked it! :)

Friday, May 25, 2012

Grilled Pineapple

Those grilling trays aren't just for veggies....

Obviously very simple: core and slice pineapple (if you get one that isn't pre-cut like I did, this is the hardest part), place on grilling tray, add to hot grill, ENJOY!

Short.  Simple.  And very, very sweet.

(If you want to make it dessert, this is also totally awesome with a little vanilla ice cream and a drizzle of caramel sauce.  But we were good.)

Thursday, May 24, 2012

Outdoor Diva

While our yard space is currently restricted, we do have a nice little patio with a private fence all around.  It's perfect for our little grill and table with two chairs.  Not much else.  I like to pretty it up when the weather is nice, but I also don't want to spend a ton of money on landscaping that I'll be leaving in 30-some days (30-some days!).

Answer: potted plants

I received two gorgeous pots from my mom as a bridal shower present last year and was able to use them for a couple of months in the fall with some mums.  Then we put them into storage for the winter.... And when I took them out last weekend, one was completely ruined.

Sad face.

I was devastated.  I totally would have gone and bought a new pot (I love them that much), but they were a seasonal item at Crate and Barrel that they did not bring back this year.  :(  On a positive note, the management at our store here was incredibly apologetic and very helpful.  Clearly they couldn't create a new pot out of thin air for me, but they did give me a refund on a gift card.  I looked around the store with Alex for a bit, but there was nothing really striking my fancy...

So we have only one pot of flowers for now.

It's a little lonely, and I'm still sad when I think of my lost, damaged pot, but it's one less thing to move, right?

Hubby's version of helping...  :-P

Wednesday, May 23, 2012

Chewy Blondies

Aside from satisfying my sweet tooth and providing the doctors and nurses at Alex's hospital with a tasty treat, this recipe also helped me start to clear out some of the baking products I have on hand....  Moving day is in about 6 weeks, and the more food I can use up between now and then, the less we have to figure out how to move!  I was able to put a dent in those pecans I have left from making this and this and also some white chocolate chips I still have leftover from Christmas.

Recipe: (from Sweet Peas Kitchen)
1 cup walnuts, toasted and coarsely chopped (I substituted pecans)
1 1/2 cups unbleached all-purpose flour
1 teaspoon baking powder
1/2 teaspoon table salt
12 tablespoons unsalted butter, melted and cooled
1 1/2 cups packed light brown sugar
2 large eggs, lightly beaten
4 teaspoons vanilla extract
3 ounces white chocolate chips
3 ounces semi-sweet chocolate chips

Preheat oven to 350 degrees.  Line a 13 x 9 inch baking pan with the baking paper of your choice.  I use Reynold's Pan Lining Paper - one side foil, one side parchment - with parchment side up.  Leave some hanging over  edge of pan for easy removal.  It also makes for easy cleanup.

Melt butter in small saucepan over medium-low heat.  When melted, set aside to cool.

Meanwhile, toast pecans/walnuts etc in 350 degree oven, on a baking sheet for 4-6 minutes.  Watch carefully.  Chop after toasting otherwise the smaller pieces will burn very quickly.  (I learned that lesson the hard way!)

In a medium bowl, whisk together the flour, baking powder, and salt.

In a second medium bowl, whisk together the melted butter and brown sugar until combined.

Add eggs and vanilla and mix well.

Using a rubber spatula, fold dry ingredients into wet ingredients just until combined; do not over mix.

Fold in chocolate and nuts.


Pour into prepared pan and smooth top with spatula.

Bake until top is shiny, cracked, and light golden brown, about 22-25 minutes.

Cool on wire rack at room temperature before removing from pan, about 2 hours.  Then carefully slice and serve!

Verdict:
If you like blondies, you'll like this recipe.  I'm actually not the hugest fan of white chocolate anymore but in this recipe with the semi-sweet chips and pecans, there were so many other flavors that the white chocolate added to the sweetness pleasantly.

While it's certainly not in the 'to-die-for' dessert category, it's a good one that I'll keep on hand for future use.  You never know when you'll need a good blondie!